In this part I will focus a bit more on provinces. There are some concepts I want to refine and clarify. I will also introduce a replacement for the encounter roll, that adds much more dynamic and interesting play.
I apologize, as this will be quite a long article and there will be a lot of information thrown at you. Most of these will be elaborations on things other people have written. It's a hodgepodge of mechanics and concepts that I frankensteined together, to create the experience I want. Hang tight.
Refining Provinces
I deliberately left some things out from part 1 and kept it vague. This holds for example on why there are provinces in the first place, the encounter roll and other bits an pieces. So lets go into more detail.
Naming, Structure and Purpose
The name province is an old roman way to divide up portions of land administratively. As such you might assume, that all of these provinces are under the control of somebody - a lord or a king. But this doesn't have to be. You can also think about it as Zones, Sectors or Regions. It is a division of the overall world into smaller, more digestible pieces.
You can go ahead and create a 10x10 or 20x20 hexmap if you so wish. You will not be happy. And with such a big map, you will eventually fall back and divide the map into smaller zones anyway. Take the map from Wolves Upon the Coast for example. There are divisions politically - denoted in the red outlined regions - as well as geographically.
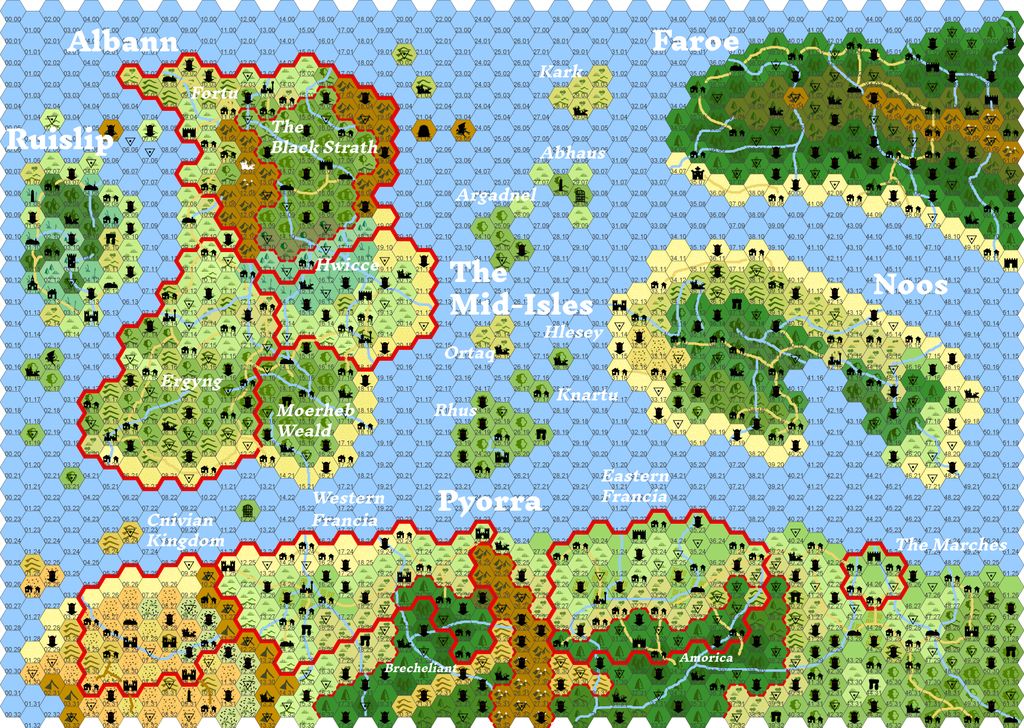
Image courtesy of Wolves Upon the Coast
The thing is, you generate the map at the beginning and then you will be stuck with it. You migth want to explore a big desert later on, but now you are stuck with whatever you have. With small provinces you can mix and match as you go.
Think of it like a Super Mario map.
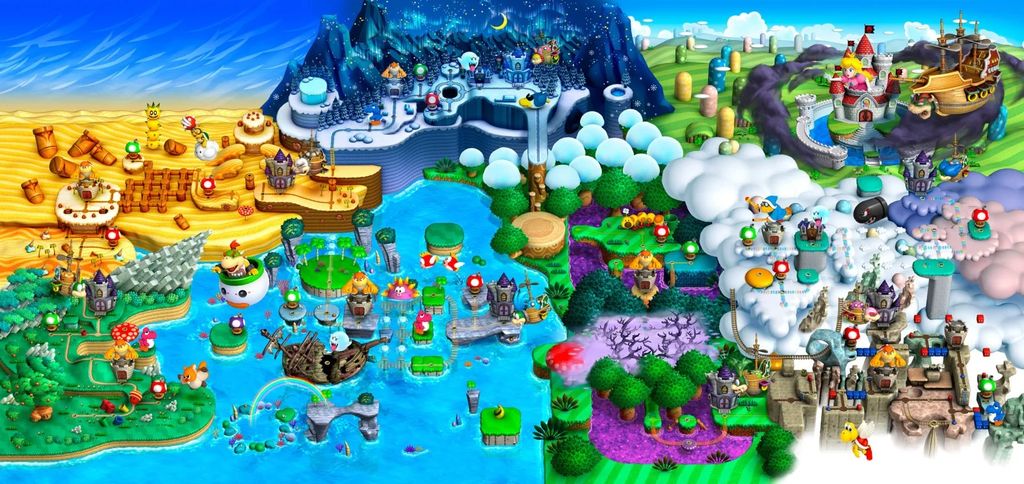
Image courtesy of Nintendo
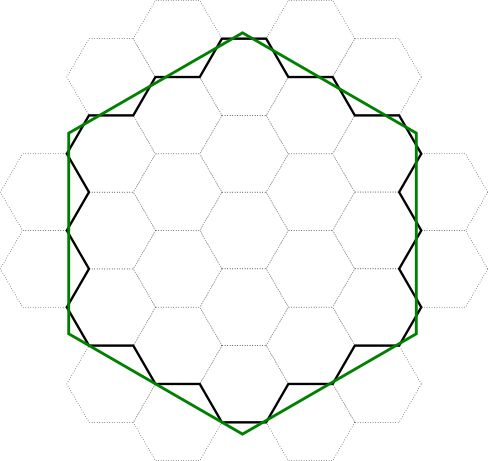
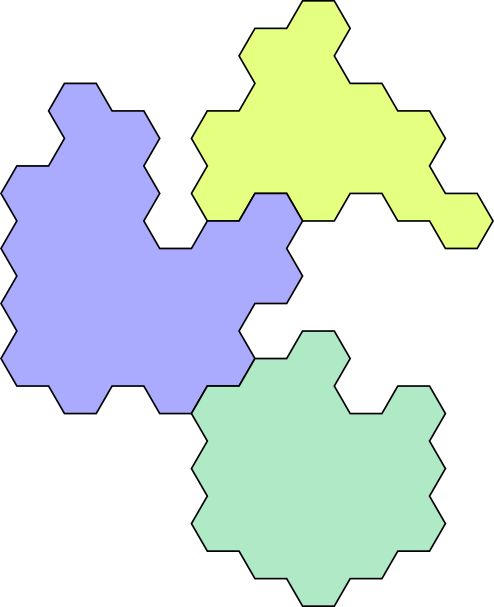
If you are not a fan of having to draw random shapes, you can just assume that all provinces have a size of 19 - which conveniently is the mean of 2d12 + 6. This gives you a regular shape, that itself is almost a hex again. So you can tile these to a big world map. But I'm more partial in having a little puzzle and irregular sizes of provinces.
Biomes
Instead of using traditional terrain generation, such as the hexflower, I tend to use something more akin to biomes. A biome is nothing more, than a tailor-made random table, but with the benefit I can choose which terrains I want to see. And I can choose some unconventional types as well - apart from the standard seven or eight types the generators give you.
There are four terrain types that are ranked from Common to Rare that can occur. The table is constructed as follows:
| d12 | Terrain | Probability | Estimation [#Hexes] |
|---|---|---|---|
| 1 | Rare | 8.33% | 1.6 |
| 2 | Rare | 8.33% | 1.6 |
| 3-6 | Uncommon | 33.33% | 6.3 |
| 7-12 | Common | 50% | 9.5 |
The Estimation gives you the amount of hexes, that will have the given terrain on the average province size of 19.
Here are some example Biomes you can use.
| Wetlands | Flat | Arctic | Arid | |
|---|---|---|---|---|
| 1 | Fungal | Hills | Glacier | Wasteland |
| 2 | Jungle | Water | Ice | Mountain |
| 3-6 | Swamp | Forest | Hills, Snow Covered | Steppes |
| 7-12 | Marsh | Plains | Tundra, Frozen | Desert |
This gives each province a distinct flavour. In addition I can also put the wanted monsters into this province so they don't seem too much out of place, increasing the flavour even more.
Roads and Rivers
Roads and Rivers are not random. These are significant landmarks, that are used for orientation. They mostly have a reason to be there - although magic can explain a lot.
Roads are built to connect settlements. Rivers are mostly next to settlements and are always flowing from the mountains to the sea. There's a logic behind it, so a random number generator will not help you here.
This is why they are placed at the very beginning, when you also roll the terrain. Make appropriate judgement calls, were there are roads and rivers and place them accordingly. A similar reasoning can be given for settlements.
Dirt tracks and trails are crude, though. These you can, and should, discover when you explore the map. So those you will not be generated beforehand.
Factions
Another point that was not included in the first part, was the inclusion of a faction to the province. Every province should have one major faction. There might be other factions involved, but you will uncover these as you go. I suggest using the faction oracles from Ironsworn: Starforged or Ironsworn:Sundered Isles. But there are many other generators out there as well.
Note, that this faction doesn't necessarily has to be the ruler that owns the land, but can be something else. It could even be a band of monsters, that terrorizes the province.
Tension Pool
Have you ever thought - Wow, the universe must be against me? Bad News: It is. Good News: Only in RPG's (I hope). The Tension Pool is this universe. It remembers all your bad decisions. The effects might not be immediate, but they will come. Karma if you will. It's that nagging feeling at the back of your head - something is not right.
The Tension Pool is replacing the encounter roll after each day. Instead of having that 50% chance every time you travel, you will interact with the Tension Pool. The problem with rolling a die every time you do something is its high variance and it acts as a surprise.
I'm more in favour of suspense. Surprise is when the aliens suddenly attack. Suspense is when you know the aliens are getting closer. The latter is far more exciting. You know something is going to happen, but you don't know when. So you can plan and act accordingly. It returns player agency.
In addition, the Tension Pool simulates, that stuff is happening around you. The world is living.
Rules
Sadly, I didn't come up with the idea, but AngryGM did. I summarize and streamline the rules here.
The Tension Pool consists of a transparent container, that is positioned such that all players including the GM can see it at all times.
The Tension Pool knows the following actions:
- Add - Add a d6 to the container
- Roll - Take all the dice in the container and roll them. If any of the dice show 1, a Complication occurs. Then put all rolled dice back into the container.
- Reset - Remove all dice from the container.
If you need to Roll the Tension Pool and there are no dice in the pool, roll one d6 instead and proceed as normal. Do not put this die into the pool.
Consider the following conditions, when the Tension Pool is in play:
- Whenever a player takes a Time-Consuming action, Add
- Whenever a player takes a Reckless action, Roll
- Whenever a player takes a Reckless and Time-Consuming, Add, then Roll
- Whenever you add the sixth die to the Pool, Roll, then Reset
If you add the sixth die, due to a Reckless and Time-Consuming action, do not roll the Tension Pool twice, but proceed as you would if you added a sixth die.
What is left is to define what a Time-Consuming and Reckless action is. This is of course to most part at the GM's discretion. However it should be always and announced properly - of course in solo play this isn't that much of a problem. "Are you really sure you want to do that?"
It follows very simply, that each travel day is a Time-Consuming action. So every hex you travel, you add a die into the pool and at the end of the sixth day, you roll to see what happens.
A Reckless action could be, that you take the short route over the mountains, that has been described by the locals as dangerous, instead of taking the longer route around it.
The other thing is, that you can also adjust the amount of dice you add to the Tension Pool. Travel through the desert is difficult so add two dice to the pool. But the travel time is unaffected. It sill uses 1 day. Alter Difficulty, Not Pace.
Complication
But what happens, when a 1 is rolled in the Tension Pool? I use another tool here: The Hazard Die - in particular the overloaded hazard die. It basically is like the normal encounter die you would know. On a 1 an encounter happens. But what about the other numbers? Well that is what the Hazard Die adds.
I changed the odds slightly and use a d12 to check for what the complication is.
| d12 | Complication | Probability |
|---|---|---|
| 1 | Fatigue | 8.33% |
| 2-3 | Locality | 16.66% |
| 4-6 | Expiration | 25% |
| 7-9 | Setback | 25% |
| 10-11 | Percept | 16.66% |
| 12 | Advantage | 8.33% |
As you see, I no longer have a linear distribution for each of the complications. I favour more encounters and expirations. This is my preference and you can of course roll a d6 and use the default hazard die.
The point is, that some outcomes are not favourable if they come up multiple times in a row. For example Fatigue. So a less likely result will prevent this a bit.
You are always free and ignore the die and choose something more appropriate for the situation at hand.
The nice thing about these complications is, that they are context dependent on what you are currently doing. They will have a different meaning when you are in a dungeon, than when you are traveling.
For Wilderness Exploration consider the following outcomes.
- Fatigue - Travels have been more arduous than expected. You need to take rest or suffer consequences. I'll go into some detail later on.
- Locality - There are some local changes, such as weather change or a volcano erupting. Something that changes either the hex you are in or the province entirely.
- Expiration - Time-limited effects end. This could be protective spells, or conditions of the province / hex.
- Setback - an encounter happens
- Percept - Spoor or clues are being revealed, hints for next encounters
- Advantage - Nothing bad happens, or some slight boon given
Travelling and Wilderness Exploration
There are multiple mechanics that come into play in a hexcrawl, that we just glossed over or ignored, by introducing 1 hex = 1 roll. Most systems have rules when it comes to eating, getting lost, weather and so forth. With the Tension Pool and a sprinkle of imagination we can bring these back.
Weather
In general, weather is only a problem, when it's bad. Of course bad is very relative, especially to the terrain you are currently in and what you want to do. Rain is probably less bad in a desert (actually very welcome), than it is in the marshes.
I'm always an advocate of competent adventurers. They will see weather changes, dress appropriately (no bikini in the arctic) and act according to the weather. Of course in rare cases you get surprised by the weather. And this can be represented by the Locality complication in the Tension Pool.
We introduce a condition Bad Weather to the province. Actions are more likely to be Reckless in this weather. You might want to seek shelter, invest some time to cope with the weather. Maybe the area you are currently in, isn't explored so you might risk getting in trouble there.
There are then two ways to clear this condition: * When you roll Expiration as Complication * You could roll a d6 after some in-game time - like every 4 hours - and on a one, the weather clears up again
Nourishment and Sleep
Every day you have to eat a ration or some food and water. If you can't, the character becomes Fatigued. There's no roll involved here. This just happens. You might have rules in your system what this might entail. In Forbidden Lands you have to roll your resources for example. The same goes for sleep.
When traveling it is implied, that part of the day you will use to sit down and eat, stand watch and sleep.
If you are Fatigued your actions, once again, can become Reckless, if they are not related to get you some food. So you have to stop and forage in the current area. Also consider additional rules in the system you are using - for example having disadvantage on rolls.
There's also another way, you can get this condition. If you roll it as Complication. This represents, that traveling was more arduous than you expected so you needed a bit more energy. Either eat or become Fatigued.
If you are Fatigued and either need to eat some food (because another day has passed) or you get it as Complication you suffer some moderate damage. This depends on your character and level. But it should be something like 20% of your life. Since it occurs less frequent than other Complications the penalty needs to be adjusted accordingly. You can't just ignore it. There's immediate actions needed to solve this issue.
Orientation
Another possibility for Locality is becoming lost. Traveling with this condition becomes Reckless by default. You have to again spend time to reorient yourself. This can then be done using a Survival Check or something.
To see, where you actually ended up, roll a d6. Clockwise count the rolled number on the edges of the hexagon to see where you left the hex. This is where you ended up.
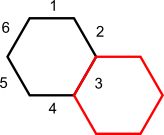
For example. If I rolled a three, I would have been displaced to the south-east.
Encounters
This is the bread and butter of the Complications. Normally this is what is meant by rolling a random encounter. We tailor this table to the biome and province. You can either fill in the table at the beginning when you are creating the province, or as soon as you need it. I prefer the latter one, because it is another part of the exploration. Once you are familiar with the province, you know what to expect. Should you return later to this area you might be more prepared to the dangers. Kind of like in video games - The snow golems only appear in the Winter Zone.
Similar to the terrain table we have different rarities of encounters we can have and thus their probabilities change.
| d12 | Encounter | Probability |
|---|---|---|
| 1-3 | Common (Faction) | 25% |
| 4-6 | Common (Monster) | 25% |
| 7-8 | Uncommon (Faction / Monster) | 16.66% |
| 9-10 | Uncommon (Monster) | 16.66% |
| 11 | Special (Stray / Unusual / Magical) | 8.33% |
| 12 | Special (Zone Boss / Deadly) | 8.33% |
You notice, that this encounter table tends towards more combat oriented encounters. This is fine, since we are introducing other obstacles by different Complications (such as weather). It also tends to produce more monsters than NPCs. Of course you could adjust this to your needs and it can differ from province to province.
There are some things I want to take some special attention here. In the Rare slots, we have special encounters. One I consider the Zone Boss. This could be a single monster that terrorizes the region (such as a dragon, or a griffin). This can be a very hard encounter, that likely means death.
The other special encounter is something that does not fit into the province. Something that wandered from another province here. This could also be a spy from another kingdom for example, that tries to find a weakness in this province's defences. Or you can roll the encounter table from any adjacent province and take a monster from there.
Factions also come into play here. You could for example put in the common encounter, NPCs from the major faction and in the uncommon slot from one of the minor factions. This opens up some interesting conflicts.
Reaction Roll
In old-school games, there was normally a roll to see how the monsters (or in general the encounter) react to the player. Not all encounters need to end in combat. Some could be avoided by sneaking around.
Mike "Sly Flourish" (YT) simplifies this roll. He calls it tableless check for Attitude and Distance. You roll a die for each. The lower the number, the closer or friendlier the encounter is. The higher the roll, they tend to be more hostile or can be farther aware. You could also interpret it as a scale from good to bad.
I can just roll 3d12 at the same time with the encounter table. One is for the encounter, one for Attitude and one for Distance.
- Attitude: 1 = friendly, 7 = indifferent, 12 = Hostile
- Distance: 1 = close, 7 = near, 12 = far, alternatively multiply by 10 feet
You can also define an activity that the encounter is doing. This depends on the monster and the narrative situation. This could give your character a chance on sneaking up on the monster if it sleeping for example.
Conclusion
The Tension Pool simplifies the hexcrawl procedure immensely. There are less moving parts I have to take care of and the state of the game is clear at any moment in time. No complicated procedures needed.
What is missing is some sort of worksheet for the province (and the campaign in general), so that I have the necessary tables quickly at hand. And I will also write up all that I have discussed here in a nice little document, so that everything is concentrated in one place. I've referenced many things and I don't want to end up having to open up hundred of different documents (again).
So far we mostly covered what happens when you travel from hex to hex, but not what happens and what you can do, once you are in a hex. I will cover this in the next - and hopefully - last part of this series.
Further Reading: The Underclock: Fixing the Random Encounter, Tension About the Tension Pool, A Guide to Hexcrawling - Part 1, Hazard table / Tension pool / Overloaded encounter table mashup, Exploring OSR Design, West Marches (part 3), Recycling